Posted on — Leave a comment

Residual Solvent Testing: Limits, COAs, and Solvent Purity

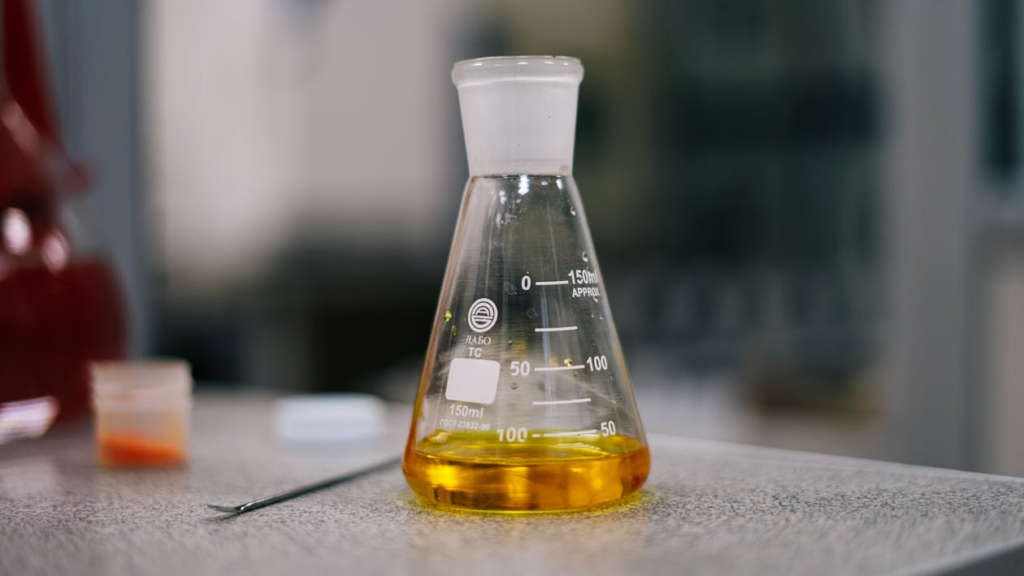
Residual solvent testing

A failed residual solvent panel rarely means something went wrong in a single run. Usually it means the process has been running closer to the limit than anyone realized, and this batch is just the one that crossed it. 

Residual solvent testing is the checkpoint where that gets caught, and understanding what the panel actually measures, what your state allows, and how to read the result changes how you react to a fail: as a process problem to fix, or as a solvent problem you have been carrying for months without knowing it.

This guide walks through the residual solvent panel itself, the action limits in California and Colorado, how to actually read a COA instead of just checking for a pass or fail stamp, and why starting with a higher-purity solvent removes an entire category of failure before it happens.

What a Residual Solvent Panel Actually Measures

When a concentrate is tested for residual solvents, a lab is measuring how much of the extraction solvent, and any processing chemicals used afterward, remain trapped in the finished product. For hydrocarbon extraction, that means butane, propane, and isobutane specifically, along with any other solvents used in post-processing. The panel does not care why the solvent is still there. It only reports how much is present against the state’s action limit for that compound.

California’s Action Limit

California classifies butane and propane as Category II residual solvents. Under California Code of Regulations, Title 4, Section 15718, the action limit for both is 5,000 micrograms per gram, reported directly in µg/g rather than converted through a separate calculation. For a hydrocarbon concentrate, that ceiling is generous enough that a properly purged batch rarely comes close to it, which is exactly why a fail in California usually points to a purge or process issue rather than a marginal call.

Colorado’s Action Limit

Colorado sets a tighter bar. Under 1 CCR 212-3-4-215, both butane and propane must test under 1,000 parts per million, roughly a fifth of California’s threshold. A batch that would pass comfortably in California can fail in Colorado on the exact same purge protocol, which is the detail that catches operators licensed in both states off guard the first time it happens.

That gap is not a technicality. It means a process tuned to California’s ceiling is not automatically compliant in Colorado, and labs running product across both states need to purge to the tighter of the two limits as their actual working standard, not the more permissive one.

Reading a COA Beyond Pass or Fail

A Certificate of Analysis lists each tested compound with its detected concentration next to the action limit, and the pass or fail stamp on the front page is the least useful part of the document if you are trying to improve your process. The numbers underneath it tell you more.

A batch that tests near zero on residual solvents tells you the purge is working and the solvent going in was clean. A batch that passes but sits close to the limit is a warning sign, not a clean result, since it means the next run with a slightly longer purge cycle or a slightly different biomass moisture level could tip over. Tracking that number across batches, not just the pass or fail line, is how labs catch a drifting process before it produces an actual failed panel.

The Variables That Cause a Failed Batch

A handful of factors push residual solvent readings up, and most of them compound each other:

  • Insufficient purge time or temperature, which leaves solvent trapped in the extract’s matrix
  • Dense or improperly agitated material during purge, which slows solvent release unevenly across the batch
  • Starting solvent that already carries a higher concentration of heavier hydrocarbons, which purge less readily than lighter fractions
  • Inconsistent lot-to-lot solvent quality, where a supplier’s spec sheet does not reflect what is actually in the cylinder

The first two are process variables a lab can tune directly. The last two are solvent variables, and they are the ones that show up as an intermittent problem that seems to have no clear process cause, because the process has not changed and the solvent has.

Why Purity Is the Fix That Removes the Guesswork

Instrument-grade solvent with tightly controlled impurity ceilings starts cleaner, and it purges more predictably, because the heavier hydrocarbon fraction that resists purging is smaller to begin with. A lab that switches to higher-purity butane is really buying a narrower range of outcomes on the residual solvent panel, batch after batch, instead of hoping the purge cycle compensates for whatever came in the cylinder that week.

How Often You Should Actually Be Testing

Most state programs require a residual solvent panel on every batch before it can be sold, so testing frequency is not really a choice. What is a choice is whether a lab treats that mandatory test as a compliance checkbox or as the process data it actually is. 

A lab that logs every COA result, not just the pass or fail line, builds a record that shows drift long before drift becomes a failure. Without that record, the first sign of a problem is often the failed batch itself, which is the most expensive and least useful place to learn that something changed.

For labs that have had an intermittent, hard-to-explain fail, working backward from the COA data to the solvent lot is a legitimate diagnostic step, and often the one that actually resolves the problem instead of just extending purge times and hoping.

After a Failed Test

A failed residual solvent panel does not have to be a dead end for the batch, but it should be a trigger to look at the solvent, not just the process. 

If your last few COAs have been trending toward the limit instead of sitting comfortably under it, that trend is worth acting on before it becomes a fail. Request a quote and AdChem can walk through your current spec against a higher-purity alternative.
Posted on — Leave a comment

N-Butane vs. Propane vs. Isobutane: Choosing the Right Solvent

Laboratory gas tanks

Most labs start on straight butane and never look back, but the operators chasing a specific texture, a specific terpene profile, or a specific reorder pattern usually end up mixing solvents on purpose. 

The question is not whether n-butane, propane, and isobutane behave differently. They do, and the difference is measurable. The question is which ratio gets you the output you are actually trying to sell, and what that ratio does to your propane extraction equipment requirements before you ever load a run.

This guide compares the three solvents on the properties that actually matter in a closed-loop system: boiling point and vapor pressure, selectivity, and the pressure rating your hardware needs to hold. Then it maps blend ratios to target outputs, so you are choosing a blend for a reason instead of copying whatever the lab down the street is running.

Boiling Point and Vapor Pressure: Where the Differences Start

Every downstream difference between these three solvents traces back to one thing: how each one behaves under pressure and temperature. According to thermophysical data from the National Institute of Standards and Technology, n-butane boils at roughly 31°F, isobutane at roughly 11°F, and propane considerably lower, at roughly negative 44°F. 

That spread is not trivia. It is the reason propane runs at higher system pressure than butane for a given temperature, and it is why a vessel rated for straight butane is not automatically rated for a propane-heavy blend.

Isobutane sits in an interesting middle position. Its boiling point is closer to butane than propane, but its branched molecular structure changes how it interacts with plant material, which brings us to the part that actually affects your finished product. 

None of these numbers change because a supplier’s spec sheet rounds differently. They are physical properties of the molecule, and they are why a recipe that works on one solvent does not automatically transfer to another without adjusting temperature, pressure, or both.

Selectivity: What Each Solvent Pulls From the Plant

Butane is the least selective of the three. It pulls a broad range of compounds out of the biomass, including more plant lipids and waxes alongside the cannabinoids and terpenes you want. That is not automatically a bad thing. Non-selective extraction tends to produce higher raw yield, and post-processing techniques handle the unwanted material afterward.

Propane is the more selective solvent. It is less aggressive toward plant lipids, which means a crude extract that starts cleaner and often needs less remediation to reach a stable, terpene-forward finished product. The tradeoff is a lower raw yield per run, since propane simply pulls less total material out of the same biomass.

Isobutane lands closer to propane in practical selectivity, though labs that have run both report it as slightly less aggressive than straight butane without matching propane’s full selectivity advantage. Where it earns its place is in blends, where a small isobutane fraction can shift a butane-heavy mix’s behavior without pushing system pressure as high as adding more propane would.

Blend Ratios and What They’re Built For

Live resin and HTFSE generally call for a propane-forward blend. Fresh-frozen biomass is fragile, and a cold, fast, selective pull preserves the terpene profile that live resin and high-terpene full-spectrum extract are sold on. Operators running these categories often lean toward a blend weighted more heavily toward propane than a standard dual blend provides.

Shatter and other stable, glassy concentrates tolerate a less selective solvent better, since the post-processing steps that get an extract to shatter consistency also strip out more of what a non-selective solvent pulled in. A butane-forward blend, or straight butane, is common here.

General-purpose BHO production, where the target is neither maximum terpene preservation nor a specific glass finish, is where AdChem’s 70 percent butane, 30 percent propane dual blend earns its reputation as the industry default. It splits the difference: better selectivity than straight butane, more yield than straight propane, and it is popular enough that most closed-loop systems are already tuned to run it without modification.

Equipment Pressure Ratings by Blend

This is the part operators skip until a vessel fails a hydro test. Straight butane systems can run on hardware rated for lower working pressure than a blend containing propane. As the propane fraction in your blend increases, so does the vapor pressure inside your recovery vessel at a given operating temperature, and your equipment’s pressure rating has to keep pace. A column, recovery pump, or collection vessel rated for straight butane is not automatically safe to run with a propane-heavy blend at the same temperature.

Before switching from straight butane to any blend with meaningful propane content, check your equipment’s pressure rating against the blend you intend to run, not the blend you used to run. This is a conversation worth having with your equipment manufacturer, not something to guess at based on how the last run felt. A vessel that has run straight butane safely for two years is not proof that it will run a propane-forward blend just as safely tomorrow.

AdChem’s Blend Options

AdChem stocks n-butane, propane, and isobutane as standalone solvents, along with a preset 70/30 butane-propane dual blend and a tri-blend combining all three. All are available in 100-pound cylinders and larger bulk pig containers, fitted with CGA 510 or 555 valves depending on your system.

The dual and tri-blends ship at their listed ratios. If your process calls for a ratio outside what is on the shelf, that is worth a direct conversation before you order, since blending to a nonstandard spec is not something every supplier can do on short notice.

Choosing Your Blend by Target Output

Target OutputRecommended Blend
Live resin, HTFSEPropane-forward blend
Shatter, stable glass concentratesStraight butane or butane-forward blend
General-purpose BHO70/30 butane-propane dual blend
Labs fine-tuning selectivity furtherTri-blend

Talk to AdChem About Your Blend

Switching blends changes more than your extract. It changes what your equipment needs to handle safely and how often you are reordering solvent. If you are weighing a switch, request a quote with your target output and current system pressure rating, and AdChem can help you land on the right blend and container size for your production schedule.

Posted on — Leave a comment

C1D1 vs. C1D2: Hydrocarbon Extraction Room Requirements

Gas extraction lab

Before you order equipment, before you order solvent, and definitely before you sign a lease on a space, the room classification question needs an answer. 

A C1D1 room and a Class I, Division 2 room are not interchangeable, and which one your extraction space needs to be determines your ventilation requirements, your gas detection setup, and, further down the line, how much solvent you are even allowed to keep on site.

This is an orientation guide, not code guidance. Classified area requirements vary by jurisdiction, and the final word on what your specific room needs belongs to your local fire marshal and a licensed engineer, not a blog post. What follows is the framework to understand before that conversation, so you walk in asking the right questions instead of learning the vocabulary in real time.

What Class I, Division 1 and Division 2 Actually Mean

The Division system classifies a space by how likely a flammable atmosphere is to exist there, not by how dangerous the chemical itself is. California’s Division of Occupational Safety and Health, which adopts this framework directly, defines Class I, Division 1 as a location where ignitable concentrations of flammable gas or vapor may exist under normal operating conditions, or frequently due to repair, maintenance, or leakage.

Class I, Division 2 covers a different situation: flammable gas or vapor that is normally confined within closed containers or a closed system, and that could only escape into the room through accidental rupture, breakdown, or abnormal equipment operation. Same chemical, same room, but a meaningfully different assumption about how often that chemical is expected to be present in the air.

Why This Distinction Matters in an Extraction Room

A hydrocarbon extraction system that runs as a genuinely closed loop, with solvent transferred and recovered without routine open exposure to the room, is generally the kind of setup that supports a Division 2 classification. A room where solvent transfer happens more openly, where recovery is incomplete, or where the system has a history of venting during normal operation leans toward Division 1, with the tighter equipment and ventilation standards that come with it.

This is exactly the kind of determination that should not be made by guesswork. Two labs running what looks like the same equipment can land in different classifications depending on how the system is actually operated, purged, and maintained, and that is a call for the engineer who reviews your specific setup.

Ventilation and Gas Detection: The General Shape of the Requirement

Classified rooms rely on two key controls: mechanical ventilation to keep flammable vapor below the lower explosive limit and continuous gas detection to trigger alarms or shut down equipment when levels rise.

Adequate ventilation can sometimes support a less restrictive classification, making ventilation design an important consideration early in the build-out.

The required ventilation rate, detector placement, and alarm setpoints depend on your room dimensions, solvent capacity, equipment, and local code. These values should be calculated by an engineer for your specific room.

Peer Review: What It Is and Why It Happens Before You Buy Equipment

Most jurisdictions with an established cannabis extraction industry require a professional engineer to review a closed-loop extraction system’s design before it goes into operation, sometimes before the local fire authority will even issue a permit. That review typically covers the system’s pressure ratings, the room’s classification, ventilation adequacy, and gas detection placement together, since none of those decisions actually stand alone.

Operators who buy equipment first and schedule peer review afterward sometimes find out the hardware they purchased does not fit the classification their room actually requires. Sorting out the room classification question before equipment goes on order avoids that expensive sequence entirely.

How Room Classification Caps Your Solvent Storage

Here is where the classification question stops being an abstract compliance detail and starts affecting how you order solvent. Room classification, along with your local fire code, sets a ceiling on how much flammable solvent can legally be stored on site at once. A more restrictive classification generally means a lower on-site storage allowance, which means smaller, more frequent solvent deliveries instead of stockpiling a large volume between orders.

That constraint is worth building into your supply planning from day one. A lab that sizes its delivery cadence around its actual legal storage capacity, rather than around what is convenient to order, avoids the position of either running short mid-shift or holding more solvent on site than the room is rated for.

The Cost Tradeoff Between Division 1 and Division 2

Division 1 buildouts tend to cost more than Division 2 ones, largely because the tighter classification requires more from electrical equipment, ventilation capacity, and gas detection systems.

That cost difference is why some operators work with their engineer early to determine whether process changes, such as enclosing an open transfer step or tightening a purge procedure, could support a Division 2 classification for the same room.

But this is an engineering and process decision, not a way to justify a lower classification than the operation actually requires. The room classification must reflect how the system genuinely operates, not how the operator would prefer it to be rated on paper.

Getting the Room Question Answered

Nothing in this guide replaces a conversation with your local fire marshal and a licensed engineer, both of whom need to sign off on your specific space before you are operating legally. 

Once you know your classification and your storage limit, AdChem’s team can help you build a delivery schedule around it, whether that means a standing butane order, a bundled butane and nitrogen account, or a delivery cadence tight enough to match a Division 1 storage cap.

If you are still early in planning and want to talk through what a realistic delivery schedule looks like once your room classification is set, request a quote and mention your target storage capacity so AdChem can size the right recurring order around it.

Posted on

CRC Media for Extraction: A Buyer’s Guide to Cleaner BHO

Run two batches of the same biomass through two different CRC column setups, and the test results will not look like they came from the same starting material. One batch comes out light, terpene-forward, and shelf-ready. The other comes out flat, stripped, or still carrying the color you were trying to remove. The biomass did not change. The CRC stack did.

Color remediation is one of the few process steps in BHO production where small decisions compound into noticeably different finished product. Choosing the wrong media or stacking it in the wrong order will not just fail to fix the issue, it will create new ones. What follows is for extractors who have run CRC for a while, gotten inconsistent results, and want a clearer way to think about what each media actually does.

CRC Is a Polishing Step, Not a Rescue

Worth saying up front: CRC media will not fix bad input. Pesticides, low-grade biomass, or a sloppy primary extraction will pass through to the finished product no matter how aggressively you load the column. The role of color remediation is to take an already-clean extract and refine it to the color, clarity, and consumer-facing finish that the shelf-ready market expects.

That framing matters because operators chasing problems they cannot fix with media tend to overload columns, lose yield, and strip the cannabinoids and terpenes that the extract was supposed to deliver. The first question with any CRC issue is whether the issue is actually a CRC issue.

The Six Media That Run Most Columns

Adsorbents in a CRC stack work by either polar or non-polar affinity. Knowing which category you are reaching for, and what each media is good at, narrows the decision faster than reading another spec sheet.

Silica gel sits at the top of most stacks. Polar, highly porous, and effective against chlorophyll, water-soluble compounds, and the oxidized cannabinoid material that darkens extract over time. Particle size and pore diameter vary by grade, and matching the grade to your flow rate is one of the smaller decisions that quietly pays for itself.

Activated alumina complements silica with stronger affinity for certain pesticides, fluorides, and acidic compounds. Used as a polishing layer below silica, alumina catches what the first layer let through.

Bentonite clay is the budget media that earns a seat in serious stacks. Strong adsorbent capacity for chlorophyll, fats, and waxes at a fraction of the per-pound cost of engineered media. The trade-off is more careful loading and pre-washing to keep fines out of the extract. Used well, bentonite carries a significant share of the decolorization load and leaves less work for the expensive media below it.

T5 bleaching clay is heat-activated bentonite engineered for oil decolorization. It comes from the edible oil refining world and adapted easily to cannabis. T5 is one of the most aggressive color removers available, which is both why operators reach for it and why they get burned by it. Too much T5 strips terpenes and minor cannabinoids alongside the pigments you wanted gone.

Magnesol is a synthetic magnesium silicate originally built to filter polar contaminants out of frying oils. In cannabis, it pulls oxidation products, free fatty acids, and a portion of the polar pigments that other media miss. Gentler than T5, often used as a middle layer in stacked columns.

Activated carbon is the non-polar finisher in many builds. Massive surface area, aggressive affinity for color and odor compounds, and an easy way to over-correct if you are not careful with the layer depth. Used as a thin polish at the bottom of the column, not as a bulk decolorizer.

Stacking: The Decision That Beats Media Selection

Order matters more than media. A well-built stack with adequate media in the right sequence outperforms a poorly built stack loaded with the most expensive options on the market.

The principle is straightforward: gentle and selective media first, more aggressive media downstream. A common starting configuration runs silica gel at the top, magnesol or bentonite in the middle, and a thin layer of T5 or activated carbon at the bottom. Total depth 2 to 6 inches, with wider columns at shallower depths giving you better flow control than narrow, deep packs.

Flow rate is where most stacks succeed or fail. Too slow and the extract sits in contact with the media long enough to strip terpenes. Too fast and the media does not have time to do its job. The right flow rate is the one your test results converge on after a few intentional adjustments, and it is worth dialing in once and then documenting so the next operator on the run is not solving the same problem from scratch.

Three Mistakes That Cost Real Money

Wet media is the fastest way to ruin a batch. Adsorbents arrive ready to use but pick up atmospheric moisture during storage. Loading damp media into a column introduces water into a solvent that does not tolerate it, and the result is hazy, unstable extract. Sealed storage and a pre-dry step when storage conditions are uncertain are the cheapest insurance in the lab.

Using the wrong media for the actual problem is the second pattern. An operator chasing residual chlorophyll does not need more activated carbon, they need silica or bentonite higher in the stack. Diagnosing what you are removing, instead of throwing media at the symptom, saves yield and saves money on consumables.

Inconsistent sourcing is the third. Different lots of bentonite or silica from different suppliers can behave differently in the same column setup. Locking in a supplier with consistent product and proper documentation lets you keep your stack repeatable across batches, which is what makes scaling a CRC program possible.

Buying CRC Media and the Butane That Goes With It

CRC media is a recurring purchase. Most labs running color remediation move through media on a cadence close to their solvent reorder schedule, which makes consolidating both with one supplier an easy operational win.

AdChem supplies extraction labs across California and Colorado with extraction-grade butane and PERSEUS high-purity butane on same-day delivery from regional hubs. Combining solvent and CRC media in one delivery schedule keeps inventory predictable and avoids the gap-day scrambles that derail production calendars.

Request a quote for the bundled order you actually run, sized to your throughput and your column setup. The AdChem team works with operators on the full hydrocarbon supply chain, not only the headline solvent line item.