Posted on — Leave a comment

Residual Solvent Testing: Limits, COAs, and Solvent Purity

Residual solvent testing

A failed residual solvent panel rarely means something went wrong in a single run. Usually it means the process has been running closer to the limit than anyone realized, and this batch is just the one that crossed it. 

Residual solvent testing is the checkpoint where that gets caught, and understanding what the panel actually measures, what your state allows, and how to read the result changes how you react to a fail: as a process problem to fix, or as a solvent problem you have been carrying for months without knowing it.

This guide walks through the residual solvent panel itself, the action limits in California and Colorado, how to actually read a COA instead of just checking for a pass or fail stamp, and why starting with a higher-purity solvent removes an entire category of failure before it happens.

What a Residual Solvent Panel Actually Measures

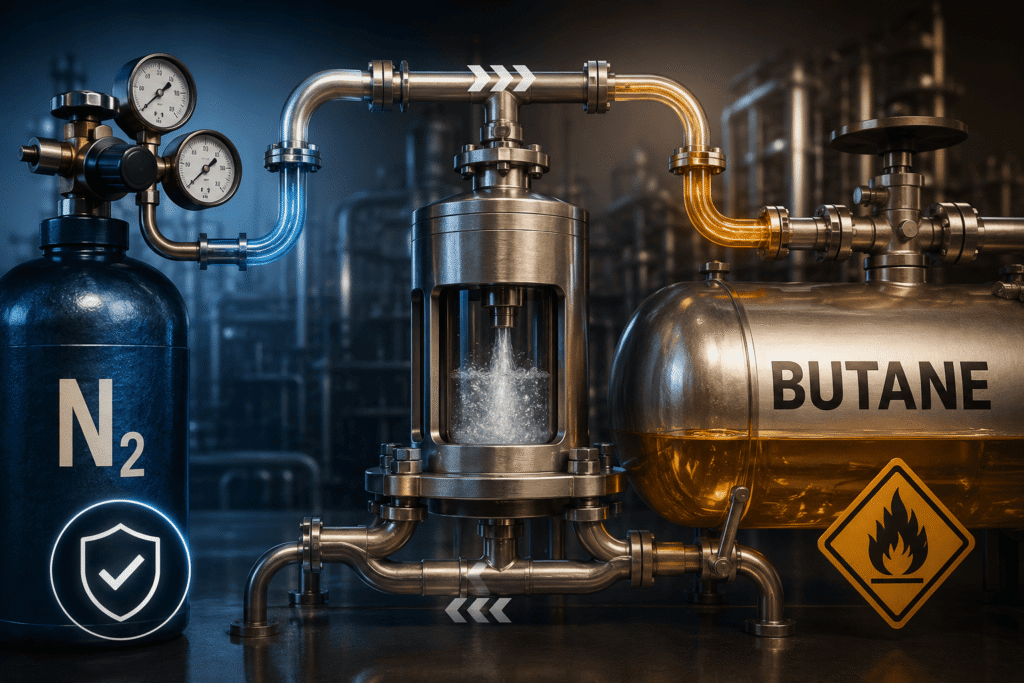
When a concentrate is tested for residual solvents, a lab is measuring how much of the extraction solvent, and any processing chemicals used afterward, remain trapped in the finished product. For hydrocarbon extraction, that means butane, propane, and isobutane specifically, along with any other solvents used in post-processing. The panel does not care why the solvent is still there. It only reports how much is present against the state’s action limit for that compound.

California’s Action Limit

California classifies butane and propane as Category II residual solvents. Under California Code of Regulations, Title 4, Section 15718, the action limit for both is 5,000 micrograms per gram, reported directly in µg/g rather than converted through a separate calculation. For a hydrocarbon concentrate, that ceiling is generous enough that a properly purged batch rarely comes close to it, which is exactly why a fail in California usually points to a purge or process issue rather than a marginal call.

Colorado’s Action Limit

Colorado sets a tighter bar. Under 1 CCR 212-3-4-215, both butane and propane must test under 1,000 parts per million, roughly a fifth of California’s threshold. A batch that would pass comfortably in California can fail in Colorado on the exact same purge protocol, which is the detail that catches operators licensed in both states off guard the first time it happens.

That gap is not a technicality. It means a process tuned to California’s ceiling is not automatically compliant in Colorado, and labs running product across both states need to purge to the tighter of the two limits as their actual working standard, not the more permissive one.

Reading a COA Beyond Pass or Fail

A Certificate of Analysis lists each tested compound with its detected concentration next to the action limit, and the pass or fail stamp on the front page is the least useful part of the document if you are trying to improve your process. The numbers underneath it tell you more.

A batch that tests near zero on residual solvents tells you the purge is working and the solvent going in was clean. A batch that passes but sits close to the limit is a warning sign, not a clean result, since it means the next run with a slightly longer purge cycle or a slightly different biomass moisture level could tip over. Tracking that number across batches, not just the pass or fail line, is how labs catch a drifting process before it produces an actual failed panel.

The Variables That Cause a Failed Batch

A handful of factors push residual solvent readings up, and most of them compound each other:

  • Insufficient purge time or temperature, which leaves solvent trapped in the extract’s matrix
  • Dense or improperly agitated material during purge, which slows solvent release unevenly across the batch
  • Starting solvent that already carries a higher concentration of heavier hydrocarbons, which purge less readily than lighter fractions
  • Inconsistent lot-to-lot solvent quality, where a supplier’s spec sheet does not reflect what is actually in the cylinder

The first two are process variables a lab can tune directly. The last two are solvent variables, and they are the ones that show up as an intermittent problem that seems to have no clear process cause, because the process has not changed and the solvent has.

Why Purity Is the Fix That Removes the Guesswork

Instrument-grade solvent with tightly controlled impurity ceilings starts cleaner, and it purges more predictably, because the heavier hydrocarbon fraction that resists purging is smaller to begin with. A lab that switches to higher-purity butane is really buying a narrower range of outcomes on the residual solvent panel, batch after batch, instead of hoping the purge cycle compensates for whatever came in the cylinder that week.

How Often You Should Actually Be Testing

Most state programs require a residual solvent panel on every batch before it can be sold, so testing frequency is not really a choice. What is a choice is whether a lab treats that mandatory test as a compliance checkbox or as the process data it actually is. 

A lab that logs every COA result, not just the pass or fail line, builds a record that shows drift long before drift becomes a failure. Without that record, the first sign of a problem is often the failed batch itself, which is the most expensive and least useful place to learn that something changed.

For labs that have had an intermittent, hard-to-explain fail, working backward from the COA data to the solvent lot is a legitimate diagnostic step, and often the one that actually resolves the problem instead of just extending purge times and hoping.

After a Failed Test

A failed residual solvent panel does not have to be a dead end for the batch, but it should be a trigger to look at the solvent, not just the process. 

If your last few COAs have been trending toward the limit instead of sitting comfortably under it, that trend is worth acting on before it becomes a fail. Request a quote and AdChem can walk through your current spec against a higher-purity alternative.
Posted on — Leave a comment

N-Butane vs. Propane vs. Isobutane: Choosing the Right Solvent

Laboratory gas tanks

Most labs start on straight butane and never look back, but the operators chasing a specific texture, a specific terpene profile, or a specific reorder pattern usually end up mixing solvents on purpose. 

The question is not whether n-butane, propane, and isobutane behave differently. They do, and the difference is measurable. The question is which ratio gets you the output you are actually trying to sell, and what that ratio does to your propane extraction equipment requirements before you ever load a run.

This guide compares the three solvents on the properties that actually matter in a closed-loop system: boiling point and vapor pressure, selectivity, and the pressure rating your hardware needs to hold. Then it maps blend ratios to target outputs, so you are choosing a blend for a reason instead of copying whatever the lab down the street is running.

Boiling Point and Vapor Pressure: Where the Differences Start

Every downstream difference between these three solvents traces back to one thing: how each one behaves under pressure and temperature. According to thermophysical data from the National Institute of Standards and Technology, n-butane boils at roughly 31°F, isobutane at roughly 11°F, and propane considerably lower, at roughly negative 44°F. 

That spread is not trivia. It is the reason propane runs at higher system pressure than butane for a given temperature, and it is why a vessel rated for straight butane is not automatically rated for a propane-heavy blend.

Isobutane sits in an interesting middle position. Its boiling point is closer to butane than propane, but its branched molecular structure changes how it interacts with plant material, which brings us to the part that actually affects your finished product. 

None of these numbers change because a supplier’s spec sheet rounds differently. They are physical properties of the molecule, and they are why a recipe that works on one solvent does not automatically transfer to another without adjusting temperature, pressure, or both.

Selectivity: What Each Solvent Pulls From the Plant

Butane is the least selective of the three. It pulls a broad range of compounds out of the biomass, including more plant lipids and waxes alongside the cannabinoids and terpenes you want. That is not automatically a bad thing. Non-selective extraction tends to produce higher raw yield, and post-processing techniques handle the unwanted material afterward.

Propane is the more selective solvent. It is less aggressive toward plant lipids, which means a crude extract that starts cleaner and often needs less remediation to reach a stable, terpene-forward finished product. The tradeoff is a lower raw yield per run, since propane simply pulls less total material out of the same biomass.

Isobutane lands closer to propane in practical selectivity, though labs that have run both report it as slightly less aggressive than straight butane without matching propane’s full selectivity advantage. Where it earns its place is in blends, where a small isobutane fraction can shift a butane-heavy mix’s behavior without pushing system pressure as high as adding more propane would.

Blend Ratios and What They’re Built For

Live resin and HTFSE generally call for a propane-forward blend. Fresh-frozen biomass is fragile, and a cold, fast, selective pull preserves the terpene profile that live resin and high-terpene full-spectrum extract are sold on. Operators running these categories often lean toward a blend weighted more heavily toward propane than a standard dual blend provides.

Shatter and other stable, glassy concentrates tolerate a less selective solvent better, since the post-processing steps that get an extract to shatter consistency also strip out more of what a non-selective solvent pulled in. A butane-forward blend, or straight butane, is common here.

General-purpose BHO production, where the target is neither maximum terpene preservation nor a specific glass finish, is where AdChem’s 70 percent butane, 30 percent propane dual blend earns its reputation as the industry default. It splits the difference: better selectivity than straight butane, more yield than straight propane, and it is popular enough that most closed-loop systems are already tuned to run it without modification.

Equipment Pressure Ratings by Blend

This is the part operators skip until a vessel fails a hydro test. Straight butane systems can run on hardware rated for lower working pressure than a blend containing propane. As the propane fraction in your blend increases, so does the vapor pressure inside your recovery vessel at a given operating temperature, and your equipment’s pressure rating has to keep pace. A column, recovery pump, or collection vessel rated for straight butane is not automatically safe to run with a propane-heavy blend at the same temperature.

Before switching from straight butane to any blend with meaningful propane content, check your equipment’s pressure rating against the blend you intend to run, not the blend you used to run. This is a conversation worth having with your equipment manufacturer, not something to guess at based on how the last run felt. A vessel that has run straight butane safely for two years is not proof that it will run a propane-forward blend just as safely tomorrow.

AdChem’s Blend Options

AdChem stocks n-butane, propane, and isobutane as standalone solvents, along with a preset 70/30 butane-propane dual blend and a tri-blend combining all three. All are available in 100-pound cylinders and larger bulk pig containers, fitted with CGA 510 or 555 valves depending on your system.

The dual and tri-blends ship at their listed ratios. If your process calls for a ratio outside what is on the shelf, that is worth a direct conversation before you order, since blending to a nonstandard spec is not something every supplier can do on short notice.

Choosing Your Blend by Target Output

Target OutputRecommended Blend
Live resin, HTFSEPropane-forward blend
Shatter, stable glass concentratesStraight butane or butane-forward blend
General-purpose BHO70/30 butane-propane dual blend
Labs fine-tuning selectivity furtherTri-blend

Talk to AdChem About Your Blend

Switching blends changes more than your extract. It changes what your equipment needs to handle safely and how often you are reordering solvent. If you are weighing a switch, request a quote with your target output and current system pressure rating, and AdChem can help you land on the right blend and container size for your production schedule.

Posted on — Leave a comment

C1D1 vs. C1D2: Hydrocarbon Extraction Room Requirements

Gas extraction lab

Before you order equipment, before you order solvent, and definitely before you sign a lease on a space, the room classification question needs an answer. 

A C1D1 room and a Class I, Division 2 room are not interchangeable, and which one your extraction space needs to be determines your ventilation requirements, your gas detection setup, and, further down the line, how much solvent you are even allowed to keep on site.

This is an orientation guide, not code guidance. Classified area requirements vary by jurisdiction, and the final word on what your specific room needs belongs to your local fire marshal and a licensed engineer, not a blog post. What follows is the framework to understand before that conversation, so you walk in asking the right questions instead of learning the vocabulary in real time.

What Class I, Division 1 and Division 2 Actually Mean

The Division system classifies a space by how likely a flammable atmosphere is to exist there, not by how dangerous the chemical itself is. California’s Division of Occupational Safety and Health, which adopts this framework directly, defines Class I, Division 1 as a location where ignitable concentrations of flammable gas or vapor may exist under normal operating conditions, or frequently due to repair, maintenance, or leakage.

Class I, Division 2 covers a different situation: flammable gas or vapor that is normally confined within closed containers or a closed system, and that could only escape into the room through accidental rupture, breakdown, or abnormal equipment operation. Same chemical, same room, but a meaningfully different assumption about how often that chemical is expected to be present in the air.

Why This Distinction Matters in an Extraction Room

A hydrocarbon extraction system that runs as a genuinely closed loop, with solvent transferred and recovered without routine open exposure to the room, is generally the kind of setup that supports a Division 2 classification. A room where solvent transfer happens more openly, where recovery is incomplete, or where the system has a history of venting during normal operation leans toward Division 1, with the tighter equipment and ventilation standards that come with it.

This is exactly the kind of determination that should not be made by guesswork. Two labs running what looks like the same equipment can land in different classifications depending on how the system is actually operated, purged, and maintained, and that is a call for the engineer who reviews your specific setup.

Ventilation and Gas Detection: The General Shape of the Requirement

Classified rooms rely on two key controls: mechanical ventilation to keep flammable vapor below the lower explosive limit and continuous gas detection to trigger alarms or shut down equipment when levels rise.

Adequate ventilation can sometimes support a less restrictive classification, making ventilation design an important consideration early in the build-out.

The required ventilation rate, detector placement, and alarm setpoints depend on your room dimensions, solvent capacity, equipment, and local code. These values should be calculated by an engineer for your specific room.

Peer Review: What It Is and Why It Happens Before You Buy Equipment

Most jurisdictions with an established cannabis extraction industry require a professional engineer to review a closed-loop extraction system’s design before it goes into operation, sometimes before the local fire authority will even issue a permit. That review typically covers the system’s pressure ratings, the room’s classification, ventilation adequacy, and gas detection placement together, since none of those decisions actually stand alone.

Operators who buy equipment first and schedule peer review afterward sometimes find out the hardware they purchased does not fit the classification their room actually requires. Sorting out the room classification question before equipment goes on order avoids that expensive sequence entirely.

How Room Classification Caps Your Solvent Storage

Here is where the classification question stops being an abstract compliance detail and starts affecting how you order solvent. Room classification, along with your local fire code, sets a ceiling on how much flammable solvent can legally be stored on site at once. A more restrictive classification generally means a lower on-site storage allowance, which means smaller, more frequent solvent deliveries instead of stockpiling a large volume between orders.

That constraint is worth building into your supply planning from day one. A lab that sizes its delivery cadence around its actual legal storage capacity, rather than around what is convenient to order, avoids the position of either running short mid-shift or holding more solvent on site than the room is rated for.

The Cost Tradeoff Between Division 1 and Division 2

Division 1 buildouts tend to cost more than Division 2 ones, largely because the tighter classification requires more from electrical equipment, ventilation capacity, and gas detection systems.

That cost difference is why some operators work with their engineer early to determine whether process changes, such as enclosing an open transfer step or tightening a purge procedure, could support a Division 2 classification for the same room.

But this is an engineering and process decision, not a way to justify a lower classification than the operation actually requires. The room classification must reflect how the system genuinely operates, not how the operator would prefer it to be rated on paper.

Getting the Room Question Answered

Nothing in this guide replaces a conversation with your local fire marshal and a licensed engineer, both of whom need to sign off on your specific space before you are operating legally. 

Once you know your classification and your storage limit, AdChem’s team can help you build a delivery schedule around it, whether that means a standing butane order, a bundled butane and nitrogen account, or a delivery cadence tight enough to match a Division 1 storage cap.

If you are still early in planning and want to talk through what a realistic delivery schedule looks like once your room classification is set, request a quote and mention your target storage capacity so AdChem can size the right recurring order around it.

Posted on

Liquid Nitrogen Price: Per-Liter Pricing, Rental & Boil-Off

Ask three suppliers for a liquid nitrogen price and you will likely get three different numbers, even for the same purity and the same delivery zone. That is not because one of them is padding the price. “Cost” on an invoice is really several line items bundled into one figure, and every supplier bundles them differently.

This guide breaks down the variables that actually decide what you pay: pricing structure, dewar rental or deposit fees, boil-off loss, and how delivery cadence and volume commitments move the effective rate. It skips price ranges on purpose, since those shift constantly. What it gives you instead is the vocabulary to read a quote and know what it is actually telling you.

The Number on the Quote Is Not the Number You Pay

A quoted per-liter price only reflects the product moving from a supplier’s bulk tank into your container. It says nothing about delivery, about what it costs to keep the container on your dock between deliveries, or about how much of what you paid for evaporates before you use it. Two suppliers publishing the same per-liter rate can still land on very different monthly bills.

The practical fix is to stop comparing per-liter numbers on their own and start asking how each supplier structures the other cost drivers below. A slightly higher per-liter price paired with no rental fee and a generous boil-off allowance often beats a lower headline rate with neither.

Per-Liter vs. Per-Delivery Pricing

Some suppliers price strictly by the liter: you pay for exactly what fills the dewar on delivery day, and a small order costs proportionally the same as a large one. Others price by the delivery event, folding a flat trip charge into the invoice regardless of volume, which rewards larger, less frequent orders and penalizes small top-offs.

Neither structure is wrong on its own. A lab running a single dewar on a monthly schedule usually comes out ahead on a per-liter model with no delivery minimum. A facility running several dewars, or a biotech operation with tight cryopreservation timelines, often does better locking in a delivery-event rate. The right structure depends on how much nitrogen you use and how predictably you use it.

Dewar Rental and Equipment Costs

The dewar itself is rarely included in the price of the nitrogen. Suppliers either charge an ongoing monthly rental for the container or ask for a refundable deposit returned when the equipment comes back. A rental fee that looks small on one invoice adds up over a year, and a dewar left sitting on-site too long can end up costing more in fees than the nitrogen inside it.

Before agreeing to a rental structure, ask what happens if you keep the dewar longer than expected, whether the fee changes with container size, and whether buying the equipment outright makes sense for a high-volume account. AdChem structures nitrogen dewar and cylinder access as a refundable deposit rather than an open-ended monthly rental, which is one of the first questions worth putting to any supplier you are comparing.

Boil-Off: The Cost That Never Shows Up on an Invoice

Liquid nitrogen sits at roughly minus 320 degrees Fahrenheit and starts warming toward room temperature the moment it leaves a bulk tank. Even inside a well-insulated dewar, some of it continuously vaporizes to relieve internal pressure, a process suppliers call boil-off or normal evaporation rate. 

The Compressed Gas Association’s safety guidance warns against ever trapping liquid nitrogen in a sealed container, precisely because that vented gas has to go somewhere.

Boil-off is not a defect. It is physics, but it is also nitrogen you paid for that you will never use. Smaller dewars lose a higher percentage of their volume per day than large ones, since they carry more surface area relative to their contents, so several small dewars can lose more to evaporation than one larger tank. Ask what evaporation rate your dewar is rated for before assuming the cheaper container is actually cheaper.

Delivery Cadence and Volume Commitments

How often nitrogen shows up at your facility changes the effective price per liter, even when the quoted rate never moves. Frequent small deliveries mean more trips and driver time per liter delivered, and that overhead gets absorbed somewhere in the pricing. A cadence sized to how quickly you draw down a dewar smooths that out, and it is usually the single biggest lever a buyer has over the effective cost.

Suppliers also tend to offer better terms in exchange for a volume or contract-length commitment. For a Bay Area lab or biotech operation with steady, predictable consumption, this is where a buyer has the most leverage: put your monthly usage in front of your liquid nitrogen supplier and ask what a scheduled-delivery account changes about the rate, instead of ordering one-off.

What to Check Before You Sign a Supply Contract

A handful of questions separate a contract that fits your lab from one that quietly costs more than it should:

  • The pricing structure: per-liter, per-delivery, or a blend, and what triggers each
  • Equipment fees: refundable deposit versus ongoing rental, and what happens on late or overdue returns
  • The stated boil-off or evaporation allowance for the dewar size you are using
  • Delivery cadence, and whether same-day or emergency delivery carries a surcharge
  • Contract length, and what volume commitment, if any, actually unlocks a better rate

None of this replaces getting an actual quote. It just means you can read one accurately when it lands in your inbox.

Cost Drivers at a Glance

Cost DriverWhat It ChangesQuestion to Ask a Supplier
Pricing structureWhether small or large orders cost more per literPer-liter, per-delivery, or a blend?
Dewar and equipment feesWhether keeping the container on-site costs money over timeRental or refundable deposit?
Boil-off / evaporation rateHow much of what you paid for you actually useWhat evaporation rate is this dewar rated for?
Delivery cadenceThe overhead folded into each tripScheduled account or one-off orders?
Volume commitmentWhether locking in usage unlocks a lower rateWhat does a longer-term commitment change?

Getting an Accurate Quote from AdChem

AdChem supplies liquid nitrogen in dewars and cylinders across the Bay Area, with delivery cadence and account structure sized to actual lab consumption instead of one-off orders. Every scheduled-delivery account ships with a Certificate of Analysis and Safety Data Sheet on request.

If you are comparing quotes and want to know how AdChem structures pricing, equipment, and delivery cadence for your volume, request a quote with your monthly usage, or contact the AdChem team directly to set up a scheduled-delivery account.

Posted on

99% vs. 91% vs. 70% Isopropyl Alcohol: Which Purity Is Best?

The question most buyers ask before they order is not what isopropyl alcohol does. It is which concentration actually fits the job in front of them. 99% isopropyl alcohol, 91% isopropyl alcohol, and 70% isopropyl alcohol all share the same base chemical, but the water content that separates them changes how each one performs, and picking the wrong grade either wastes money or wastes time. 

This guide breaks down what each purity grade is built for, why the highest concentration is not always the best disinfectant, and what changes when purchasing moves from a single bottle to a facility account.

The Short Answer

If the surface can tolerate moisture and the goal is killing germs, 70% isopropyl alcohol outperforms the higher grades. If the goal is a fast-evaporating, residue-free clean on electronics, optics, or cleanroom surfaces, 99% isopropyl alcohol is the correct choice. 91 percent sits between the two, useful where a faster dry time than 70 percent is needed but full anhydrous performance is not required. 

None of the three is a universal upgrade over the others. Each is built for a different failure mode.

Why 70 Percent Disinfects Better Than 99 Percent

This is the part that surprises most first-time buyers: diluted isopropyl alcohol is a more effective disinfectant than the nearly pure version. The Centers for Disease Control and Prevention’s own guidance on chemical disinfectants states that the optimum bactericidal concentration for alcohols falls in the 60 to 90 percent range, and that absolute alcohol, a dehydrating agent, is actually less bactericidal than a water-alcohol mixture, because proteins denature faster in the presence of water.

In practical terms, that water content does two things. It slows evaporation, which keeps the alcohol in contact with the surface long enough to do its work, and it helps the alcohol penetrate the protein structures in bacterial cell walls instead of dehydrating them into a protective, resistant state before the kill mechanism finishes. That is why hospitals, labs, and cleanroom protocols specify 70% isopropyl alcohol for hand and surface disinfection rather than reaching for the strongest bottle available.

Why 99 Percent Is Mandatory for Electronics and Cleanroom Work

Disinfection is not the only job isopropyl alcohol does, and for a different category of work, higher purity is not optional. Electronics cleaning, circuit board rework, optical lens cleaning, and cleanroom wipedown all require a solvent that evaporates almost instantly and leaves zero water residue behind. Water left on an electrical contact or a lens coating causes corrosion, streaking, or a residue that a technician then has to remove in a second pass.

99% isopropyl alcohol, sometimes labeled 200 proof IPA, is formulated for exactly this: minimal water content, fast flash-off, and a residue-free finish. It is also the standard grade specified in most electronics manufacturer cleaning procedures, which makes it less a preference than a compliance requirement on a production line.

Water Content and Drying Time: The Practical Trade-off

The percentage difference between these grades is really a water content difference, and water content is what drives drying time. A 70 percent solution carries roughly three times the water of a 99 percent solution, which means longer flash-off time and, on some surfaces, visible streaking if it is not wiped dry. 

That trade-off is acceptable, even desirable, on a countertop or a doorknob, where contact time matters more than a fast dry. It is not acceptable on a populated circuit board, where lingering moisture risks a short.

91 Percent: The Practical Middle Ground

91% isopropyl alcohol shows up most often in facilities that need faster evaporation than 70 percent provides without moving all the way to anhydrous. It is common in laser lens cleaning, some medical device prep, and general equipment maintenance where a quicker dry time matters but the application is not sensitive enough to require true residue-free performance. 

Buyers comparing 91 against 99 percent are usually deciding how much they actually need to pay for the marginal reduction in water content, and for most non-electronics applications, the answer is not much.

Buying in Bulk: What Changes at Volume

A single gallon jug of isopropyl alcohol from a retail shelf solves a small, one-time need. It does not solve a facility’s monthly consumption, and once usage moves past a few gallons a month, retail pack sizes stop making economic sense. 

Facility accounts need three things a retail listing cannot provide: a current Safety Data Sheet and Certificate of Analysis on file for compliance records, volume pricing that actually reflects usage, and delivery that lines up with a production schedule instead of a single ad hoc purchase.

AdChem’s isopropyl alcohol is supplied at 99 percent purity in 55-gallon drums and 270-gallon totes, built for labs, electronics manufacturers, and cleanroom operations that consume it as a standing input rather than an occasional supply. Every order ships with a Certificate of Analysis and Safety Data Sheet, and recurring accounts can set up a delivery cadence instead of reordering manually each time stock runs low.

Choosing the Right Grade for Your Application

ApplicationRecommended Grade
Hand and surface disinfection70%
General facility and equipment cleaning70% to 91%
Laser optics and select medical device prep91%
Electronics, circuit boards, and cleanroom wipedown99%
Lab work requiring minimal water interference99%

Storage, Shelf Life, and Handling

Isopropyl alcohol is a Hazmat Class 3 flammable liquid regardless of concentration, which affects how it should be stored and shipped in bulk. Drums and totes should be kept in a cool, ventilated area away from ignition sources, and containers should stay sealed when not in use, since all three grades evaporate steadily once opened and exposed to air. 

Properly sealed and stored, isopropyl alcohol has a long practical shelf life, though facilities running through drum quantities regularly rarely hit a shelf-life limit before the product is consumed. Bulk buyers should also keep the current SDS on file at the point of use, not just in a back-office folder, since it is the document an inspector or a first responder will ask for first.

Talk to AdChem About Your Volume

If your facility is working through a case of small bottles every month, it is worth running the numbers on a drum. Request a quote with your monthly usage and application, or contact AdChem directly to confirm the right purity grade and pack size for your account.

Posted on

200 Proof Ethanol: Anhydrous vs. Nondenatured vs. Denatured

Buyers ask about 200 proof ethanol because the label promises the highest purity ethyl alcohol sold commercially, and most buyers still are not sure what “proof” means, when they need the nondenatured version, and when a cheaper denatured formula does the job just as well. 

Getting this wrong is not a small mistake. Using nondenatured alcohol where denatured would work means overpaying for a product with tighter production controls than the job requires. Using denatured alcohol where a formula must stay nondenatured can put a consumable product, a pharma batch, or a permit out of compliance.

This guide breaks down what 200 proof actually means against 190 proof, why nondenatured is required anywhere the alcohol will touch something a person eats, drinks, or applies to their skin, and where denatured is the correct choice on cost alone. It ends with a decision table by end use, so you can identify the right grade before you place an order.

What “200 Proof” Actually Means

Proof is a specific, legally defined term, not a marketing label. The Alcohol and Tobacco Tax and Trade Bureau, the federal agency that regulates industrial alcohol, defines proof as the ethyl alcohol content of a liquid at 60 degrees Fahrenheit, stated as twice the percent of ethyl alcohol by volume. That definition is where the math comes from: 200 proof equals 100 percent alcohol by volume, and every proof figure below that is exactly half its percentage.

Proof Percent ABV Common Name
200 proof 100% Anhydrous or absolute ethanol
190 proof 95% Standard nondenatured grain alcohol
180 proof 90% Diluted lab-grade ethanol
100 proof 50% Common spirits-strength alcohol

Anhydrous ethanol is the technical term for 200 proof product: alcohol with the water removed down to a trace, typically below 0.1 percent by volume. Reaching that level requires molecular sieve or membrane dehydration, because ethanol and water form an azeotrope at roughly 95 percent that ordinary distillation cannot break past. That extra processing step is why 200 proof costs more than 190 proof and why it is worth confirming you actually need the last 5 percent before you order it.

Why the Last 5 Percent Matters, and When It Does Not

The gap between 190 and 200 proof is not cosmetic. In extraction work, even small amounts of residual water change polarity enough to pull additional plant waxes and chlorophyll into a crude oil, which means more post-processing to reach a clean finished product. In pharmaceutical and analytical applications, trace water can interfere with reactions that require an anhydrous environment. In these cases, the 200 proof spec is not a preference, it is the spec.

For general cleaning, sanitizing, and most formulation work, 190 proof performs identically to 200 proof at a lower cost, because the small amount of residual water does not meaningfully change the outcome. Paying for anhydrous alcohol on a job that does not require it is the single most common way buyers overspend on this product line.

Nondenatured vs. Denatured: What the Difference Actually Is

Nondenatured ethanol is unmodified ethyl alcohol, chemically identical to beverage alcohol, and it is taxed and permitted accordingly under federal law. 

Denatured alcohol is ethanol that has been deliberately adulterated with a denaturant, such as methanol or a bittering agent, specifically to make it unfit for human consumption. The federal government requires this step for most nonbeverage industrial uses because it removes the product from beverage excise tax and the tighter permitting that applies to potable alcohol.

The TTB’s own tutorial on this system draws the line clearly: specially denatured alcohol is treated with denaturants under formulas authorized in federal regulation to make it unfit for beverage use, while completely denatured alcohol follows a separate set of prescribed formulas and generally does not require an industrial alcohol user permit to purchase. Which category a buyer needs depends entirely on the end application, not on preference or price alone.

When Nondenatured Is the Only Option

Nondenatured ethanol is required anywhere the alcohol will remain in, or contact, a product intended for human consumption or topical use. That includes:

  • Cannabis and hemp extraction where residual solvent may remain in the finished concentrate
  • Food and beverage production, including flavor extracts and food coloring carriers
  • Pharmaceutical and cosmetic formulation where the alcohol is a functional ingredient in the final product
  • Hand sanitizer and personal care products applied directly to skin

Buying nondenatured 200 proof ethanol for these applications is not optional. Denaturants are toxic by design, and using denatured alcohol in a consumable or topical product is both a safety issue and a regulatory violation.

When Denatured Is the Cost-Correct Call

Denatured alcohol is the right choice anywhere the alcohol evaporates or washes away without becoming part of a consumable end product. Equipment cleaning, surface disinfection in non-food environments, parts degreasing, and most industrial solvent applications fall into this category. 

Because denatured alcohol carries a lower excise tax burden and, depending on the formula, a simpler permitting path, it is typically the lower-cost option for these jobs without any performance trade-off.

TTB Permits: What Denatured and Nondenatured Buyers Should Know

Purchasing nondenatured ethanol above small quantities generally requires a federal permit as a nonbeverage alcohol dealer or user, since the product is chemically identical to taxable spirits. 

Denatured alcohol purchased under a completely denatured formula typically avoids that permit requirement, which is one of the practical reasons buyers choose it whenever the application allows. Permit requirements and the list of authorized denaturant formulas are maintained directly by the TTB and are worth confirming against your specific use case before you place a recurring order, since formula approvals and quantity thresholds do change.

Choosing the Right Grade by End Use

End Use Recommended Grade
Cannabis and hemp extraction Nondenatured, 190 or 200 proof depending on process
Food, beverage, and flavor production Nondenatured, food-grade
Cosmetic and pharmaceutical formulation Nondenatured, matched to formula specification
Equipment and parts cleaning Denatured
General sanitizing and surface disinfection Denatured
Fuel and combustion applications Denatured

Sourcing 200 Proof Ethanol From AdChem

AdChem stocks both nondenatured 200 proof ethanol and denatured ethanol in 5-gallon pails, 55-gallon drums, and 270-gallon totes, so labs and formulators can match pack size to actual consumption instead of over-ordering. Every lot ships with documentation to support your COA and compliance records.

If you are not sure which grade your process actually requires, that is a conversation worth having before the order goes in, not after. Request a quote with your intended application, or contact the AdChem team directly to confirm the right spec for your batch.


Posted on

CRC Media for Extraction: A Buyer’s Guide to Cleaner BHO

Run two batches of the same biomass through two different CRC column setups, and the test results will not look like they came from the same starting material. One batch comes out light, terpene-forward, and shelf-ready. The other comes out flat, stripped, or still carrying the color you were trying to remove. The biomass did not change. The CRC stack did.

Color remediation is one of the few process steps in BHO production where small decisions compound into noticeably different finished product. Choosing the wrong media or stacking it in the wrong order will not just fail to fix the issue, it will create new ones. What follows is for extractors who have run CRC for a while, gotten inconsistent results, and want a clearer way to think about what each media actually does.

CRC Is a Polishing Step, Not a Rescue

Worth saying up front: CRC media will not fix bad input. Pesticides, low-grade biomass, or a sloppy primary extraction will pass through to the finished product no matter how aggressively you load the column. The role of color remediation is to take an already-clean extract and refine it to the color, clarity, and consumer-facing finish that the shelf-ready market expects.

That framing matters because operators chasing problems they cannot fix with media tend to overload columns, lose yield, and strip the cannabinoids and terpenes that the extract was supposed to deliver. The first question with any CRC issue is whether the issue is actually a CRC issue.

The Six Media That Run Most Columns

Adsorbents in a CRC stack work by either polar or non-polar affinity. Knowing which category you are reaching for, and what each media is good at, narrows the decision faster than reading another spec sheet.

Silica gel sits at the top of most stacks. Polar, highly porous, and effective against chlorophyll, water-soluble compounds, and the oxidized cannabinoid material that darkens extract over time. Particle size and pore diameter vary by grade, and matching the grade to your flow rate is one of the smaller decisions that quietly pays for itself.

Activated alumina complements silica with stronger affinity for certain pesticides, fluorides, and acidic compounds. Used as a polishing layer below silica, alumina catches what the first layer let through.

Bentonite clay is the budget media that earns a seat in serious stacks. Strong adsorbent capacity for chlorophyll, fats, and waxes at a fraction of the per-pound cost of engineered media. The trade-off is more careful loading and pre-washing to keep fines out of the extract. Used well, bentonite carries a significant share of the decolorization load and leaves less work for the expensive media below it.

T5 bleaching clay is heat-activated bentonite engineered for oil decolorization. It comes from the edible oil refining world and adapted easily to cannabis. T5 is one of the most aggressive color removers available, which is both why operators reach for it and why they get burned by it. Too much T5 strips terpenes and minor cannabinoids alongside the pigments you wanted gone.

Magnesol is a synthetic magnesium silicate originally built to filter polar contaminants out of frying oils. In cannabis, it pulls oxidation products, free fatty acids, and a portion of the polar pigments that other media miss. Gentler than T5, often used as a middle layer in stacked columns.

Activated carbon is the non-polar finisher in many builds. Massive surface area, aggressive affinity for color and odor compounds, and an easy way to over-correct if you are not careful with the layer depth. Used as a thin polish at the bottom of the column, not as a bulk decolorizer.

Stacking: The Decision That Beats Media Selection

Order matters more than media. A well-built stack with adequate media in the right sequence outperforms a poorly built stack loaded with the most expensive options on the market.

The principle is straightforward: gentle and selective media first, more aggressive media downstream. A common starting configuration runs silica gel at the top, magnesol or bentonite in the middle, and a thin layer of T5 or activated carbon at the bottom. Total depth 2 to 6 inches, with wider columns at shallower depths giving you better flow control than narrow, deep packs.

Flow rate is where most stacks succeed or fail. Too slow and the extract sits in contact with the media long enough to strip terpenes. Too fast and the media does not have time to do its job. The right flow rate is the one your test results converge on after a few intentional adjustments, and it is worth dialing in once and then documenting so the next operator on the run is not solving the same problem from scratch.

Three Mistakes That Cost Real Money

Wet media is the fastest way to ruin a batch. Adsorbents arrive ready to use but pick up atmospheric moisture during storage. Loading damp media into a column introduces water into a solvent that does not tolerate it, and the result is hazy, unstable extract. Sealed storage and a pre-dry step when storage conditions are uncertain are the cheapest insurance in the lab.

Using the wrong media for the actual problem is the second pattern. An operator chasing residual chlorophyll does not need more activated carbon, they need silica or bentonite higher in the stack. Diagnosing what you are removing, instead of throwing media at the symptom, saves yield and saves money on consumables.

Inconsistent sourcing is the third. Different lots of bentonite or silica from different suppliers can behave differently in the same column setup. Locking in a supplier with consistent product and proper documentation lets you keep your stack repeatable across batches, which is what makes scaling a CRC program possible.

Buying CRC Media and the Butane That Goes With It

CRC media is a recurring purchase. Most labs running color remediation move through media on a cadence close to their solvent reorder schedule, which makes consolidating both with one supplier an easy operational win.

AdChem supplies extraction labs across California and Colorado with extraction-grade butane and PERSEUS high-purity butane on same-day delivery from regional hubs. Combining solvent and CRC media in one delivery schedule keeps inventory predictable and avoids the gap-day scrambles that derail production calendars.

Request a quote for the bundled order you actually run, sized to your throughput and your column setup. The AdChem team works with operators on the full hydrocarbon supply chain, not only the headline solvent line item.

Posted on

Dry Ice for Catering and Events: Sourcing, Handling, and Safety

Dry Ice for Catering and Events: Sourcing, Handling, and Safety

There is almost always a time element to the dry ice conversation in catering. The event is tomorrow. The pickup is at 6 AM. The venue is two hours from the last reliable supplier. The effects designer specified dry ice fog for the entrance at 7 PM and the tables at 8:30.

Dry ice for catering and events is not a logistics-optional purchase. The window between order and use is short, the applications are visible, and running out or receiving the wrong format on the day of an event creates problems that cannot be solved after the fact.

This guide covers the applications where caterers and event operators use dry ice, how to calculate quantities accurately, what handling requirements actually look like in a venue setting, and how to find a supplier capable of supporting event-day timelines.

How Caterers and Event Operators Use Dry Ice

Theatrical Fog Effects

Dry ice fog is produced by combining dry ice with warm or hot water. The resulting low-lying fog stays near floor level because the CO2 gas is denser than air, creating the classic ground-level fog effect used for event entrances, dance floors, table service, and theatrical presentations.

The effect requires a steady supply of pellet or rice format dry ice fed continuously into the water, and it dissipates quickly as the CO2 disperses. For a sustained fog effect over a period of minutes, the dry ice consumption rate is higher than most first-time operators expect, and under-ordering for a theatrical application is visible and irreversible during the event.

Plated Service and Tableside Effects

High-end catering presentations use small quantities of dry ice in individual service vessels to create a fog effect at the table when warm liquid is added during service. Dessert presentations, cocktail service, and first-course plating all use this technique.

The dry ice pieces used for plated service are typically small and precisely portioned in advance. The operations team handles them in the kitchen before service, and they are placed in sealed vessels that open at the table. This application uses relatively small quantities but requires the right format and precise timing of prep relative to service start.

Food Preservation and Temperature Maintenance

Caterers use dry ice to maintain proteins, seafood, and temperature-sensitive ingredients at safe temperatures during transport, staging, and multi-hour events where refrigeration is not continuously available. Unlike gel packs, dry ice maintains sub-zero temperatures and keeps frozen product frozen rather than simply cold.

FDA Food Code guidelines on temperature control for safety establish that temperature-sensitive foods must remain below 41°F during holding. Dry ice, which sublimates at negative 109 degrees Fahrenheit, provides a reliable mechanism for maintaining cold chain compliance during transit and staging in the absence of mechanical refrigeration.

Ice Sculpture Preservation

Dry ice slows the melt rate of ice sculptures and decorative ice elements during extended events. Placed around the base of a sculpture in an insulated container, dry ice maintains the ambient cold that slows surface melt, extending the visual life of ice elements that would otherwise degrade significantly over the course of a multi-hour event.

Quantity Planning for Events

Dry ice quantity planning for events differs from food shipping because the applications are more varied and the consequences of underordering are immediate and visible.

Fog Effects

A standard dry ice fog machine consumes roughly 5 to 10 pounds per 10-minute fog cycle, depending on the machine capacity and the water temperature. A continuous fog effect for a 30-minute event entrance or a 2-hour dinner service with periodic fog will move through substantially more material than most organizers initially budget.

Working backward from the effect schedule, the machine specs, and the venue layout gives you a more accurate quantity than any general rule of thumb.

Food Preservation

For catering applications where dry ice is maintaining food temperature during transport and staging, the standard sublimation rate of 5 to 10 pounds per 24-hour period applies, with the lower end achievable in well-insulated containers. For a 4- to 6-hour event catering window, 10 to 15 pounds in a quality cooler with minimal air gaps is a reasonable working estimate for most applications.

Buffer Stock

For any event application, ordering more than your calculated minimum is not waste management, it is risk management. There is no way to obtain additional dry ice at 9 PM during a wedding reception if the fog effect runs out. A 20% buffer on your calculated quantity is standard practice for experienced event operators.

Safe Handling in Event Environments

Dry ice handling in event settings involves staff who may not be familiar with the material, often in low-light conditions with time pressure. Getting safety right requires preparation, not just awareness.

Personal Protective Equipment

Insulated gloves are required for all handling. Direct contact with dry ice causes frostbite in seconds and can occur through thin fabric or bare skin contact. Every team member who will handle dry ice at the event needs gloves before the event begins.

Ventilation

Dry ice sublimates continuously into CO2 gas. In enclosed spaces like venue refrigeration rooms, catering prep areas, or closed vehicles, CO2 can accumulate to concentrations that cause symptoms ranging from headache and dizziness to more serious effects at higher concentrations.

The solution is straightforward: keep dry ice storage and working areas well ventilated, keep vehicle windows open during transport, and never store dry ice in a sealed airtight container. Styrofoam coolers with loosely placed lids are the standard for most catering storage.

Never Use Dry Ice in Enclosed Serving Vessels

Dry ice should never be placed directly in a drink or in a sealed serving container that a guest will handle. The CO2 released as it sublimates creates pressure in a sealed container. Dry ice used for tableside effects is always in a vessel that the service team controls, placed in warm water, and presented to guests as a visual display, not as an ingredient.

Finding a Supplier That Works on Event Timelines

Event catering runs on timelines that do not flex. A supplier who delivers the day before when you need same-day, or delivers the wrong format when the fog machine requires a specific pellet size, is not a supplier you can build an event program around.

AdChem delivers dry ice to caterers and event operators across the Bay Area from an East Bay distribution hub, with same-day delivery available throughout California for orders placed within the daily cutoff window. Both rice and pellet formats are available in quantities that fit event-scale needs. Contact the team to confirm same-day availability, format options, and delivery scheduling for your next event.

Posted on

CO2 for Beverage and Hospitality: A Bay Area Supplier’s Guide

CO2 is not a glamorous topic in the beverage and hospitality business. It sits in the back of house, it mostly works, and nobody talks about it until it does not.

When it does not, the bar stops pouring. The draft lines go flat. The soda machine stops carbonating. The carbonation on a batch of kombucha comes out wrong. And the person responsible for preventing that is suddenly having a very bad day.

This guide is for operators across the Bay Area who want to understand what beverage-grade CO2 actually requires, how to size their supply correctly, and what makes a supplier worth building a recurring account with.

Why Beverage Grade Is Not Optional

Industrial CO2 and beverage-grade CO2 are not interchangeable, and using industrial-grade CO2 in a beverage application is both a product quality problem and a regulatory one.

Beverage-grade CO2 must meet purity specifications set by the International Society of Beverage Technologists (ISBT), which requires a minimum purity of 99.90% with strictly controlled ceilings on specific contaminants including total hydrocarbons, acetaldehyde, benzene, and sulfur compounds. Industrial CO2 may contain residual contaminants from the production process that are harmless in welding or refrigeration applications but directly affect the taste, aroma, and safety profile of beverages.

ISBT published guidelines on beverage-grade CO2 quality establish the analytical thresholds and testing protocols that responsible beverage suppliers and their customers use to verify purity at the point of delivery. Any supplier providing CO2 for beverage applications should be able to provide documentation that their product meets current ISBT standards.

Where CO2 Shows Up in Beverage and Hospitality Operations

Draft Beer Systems

CO2 pressurizes kegs and pushes beer through draft lines to the tap. The gas does not contact the beer directly in most draft configurations, but purity still matters: off-spec CO2 that outgasses through a regulator failure or line issue can affect flavor, and beverage-grade certification protects the operator from that variable.

Draft systems typically run at 10 to 14 PSI for standard domestic lagers and ales. Higher-carbonation styles and longer line lengths require higher operating pressure. The cylinder size and regulators need to be sized to the system, and the delivery cadence needs to account for how many kegs move in a given week.

Carbonation: Soda Systems, Kombucha, and Craft Beverage Production

Post-mix soda systems, sparkling water dispensers, and inline carbonation equipment all require beverage-grade CO2 in contact with the finished beverage. For craft producers carbonating kombucha, sparkling juice, or specialty beverages at production scale, CO2 purity is directly traceable to product quality and is subject to quality assurance documentation in regulated production environments.

Coffee and Espresso

Specialty coffee operations use CO2 for cold brew carbonation, nitrogen-CO2 blends for nitro coffee, and pressurized dispensing systems for cold brew on tap. The CO2 component in these applications requires the same beverage-grade standard as any other application where the gas contacts the finished product.

Restaurants and Bars

In addition to draft beer, most full-service restaurants and bars use CO2 for bag-in-box soda systems and post-mix dispense equipment. High-volume establishments go through CO2 faster than operators sometimes project, and a supplier that cannot accommodate volume spikes during peak periods creates service gaps that show up at the bar.

Cylinder Sizing for Your Operation

Getting cylinder size right reduces the frequency of changeouts and the risk of running out during service. The trade-off is storage space and weight, which are real constraints in Bay Area commercial kitchens and bar backs where every square foot is managed.

Small Format: 5 to 20 lb Cylinders

Small cylinders work for lower-volume applications, backup supply, and operators with very limited storage. The trade-off is frequent changeouts, higher per-unit cost, and a tighter margin for error on supply timing.

Standard Format: 20 to 50 lb Cylinders

The 20-pound cylinder is the standard for most restaurant and bar applications. It fits under most bar counters with proper securing, handles a week to several weeks of standard draft and soda service depending on volume, and is manageable for one person to change.

High-Volume: 50 lb and Bulk Supply

High-volume bars, brewpubs, and production operations benefit from larger cylinders or bulk supply arrangements that reduce changeout frequency and cost-per-pound. Operators who find themselves changing cylinders more than once a week should evaluate whether a larger format or scheduled bulk delivery would simplify operations and reduce costs.

Building a Reliable CO2 Supply Program in the Bay Area

The Bay Area’s hospitality and beverage market operates at high volume with high real estate costs, which means back-of-house efficiency matters more here than in most markets. A CO2 supplier who shows up reliably, on schedule, and with the right format is a straightforward operational requirement.

What to look for in a beverage CO2 supplier:

  • Documented beverage-grade purity certification with each delivery
  • Cylinder and bulk formats that fit your storage and consumption pattern
  • Delivery scheduling that aligns with your production or service calendar, not a general industrial schedule
  • Volume pricing for recurring accounts that makes the cost predictable
  • A team that understands beverage applications, not just industrial gas logistics

AdChem supplies beverage-grade CO2 to restaurants, bars, breweries, and craft beverage producers across the Bay Area from East Bay distribution hubs with same-day delivery available throughout California. 

Contact the team to set up a recurring delivery account and discuss cylinder sizing and volume pricing for your operation.

Posted on

Nitrogen in Hydrocarbon Extraction: How to Push Butane Safely Through a Closed-Loop System

Most butane buyers are also nitrogen users. They just do not always think of it that way.

In a closed-loop hydrocarbon extraction system, nitrogen is the working gas that moves solvent from the tank into the column, pressurizes transfer lines, supports purge cycles, and is the tool you reach for during leak checks. It is not optional equipment. It is part of every run.

What follows is a practical explanation of how nitrogen functions in closed-loop extraction, the pressure parameters that matter, the purge and leak-check protocols that keep operators safe, and what to think through on the supply side when you are running both gases regularly.

Why Nitrogen, Not Butane Pressure, Does the Moving

Butane in a closed-loop system does not push itself. At operating temperatures, it produces vapor pressure, but using that vapor pressure to drive flow through the column creates a recovery problem at the end of the run and limits your ability to control flow rate precisely.

Nitrogen is introduced as a separate, inert pressurizing gas. It does not dissolve into the butane meaningfully, does not react with cannabis biomass, and does not contribute residual solvent to the extract. Its function is purely mechanical: it provides the pressure differential that moves solvent where you direct it.

This separation of roles, butane as the extracting solvent and nitrogen as the motive force, is what makes closed-loop hydrocarbon extraction controllable and repeatable at commercial scale.

Operating Pressure Ranges and Why They Matter

Nitrogen injection pressures in most commercial closed-loop systems run between 10 and 60 PSI depending on system design, column size, and the flow rate you are targeting. Operating outside the manufacturer’s recommended pressure range is the most common cause of seal failures, fitting leaks, and unexpected pressure events in the extraction space.

Lower pressure gives you slower, more controlled flow with more contact time between solvent and biomass. Higher pressure moves solvent faster but reduces contact time and increases the mechanical stress on fittings and vessels. Most operators find their preferred operating pressure through experience with their specific system and biomass, then lock it in as a documented parameter for consistency.

The safety logic behind nitrogen purging in hydrocarbon extraction follows the same engineering principles codified in NFPA 56, the standard for fire and explosion prevention during cleaning and purging of flammable gas piping systems, which defines purge-into-service and purge-out-of-service protocols for closed systems handling flammable gas. 

In both cases, the principle is the same: inert nitrogen displaces oxygen or flammable vapor so that neither an ignitable atmosphere forms before butane is introduced, nor a hazardous one remains when the system is opened afterward.

Purge Cycles: What They Are and Why They Cannot Be Skipped

A purge cycle uses nitrogen pressure to remove residual butane from the system at the end of a run, or to prepare the system before a run begins. There are two types.

Pre-Run Purge

Before introducing butane into the system, a nitrogen purge clears residual air and moisture from lines, columns, and vessels. Air and butane create a flammable mixture within the explosive limits. Nitrogen, which is inert, displaces the air and establishes a safe atmosphere for butane introduction.

Skipping the pre-run purge is not a shortcut. It is removing the primary safety step that separates a controlled extraction run from an uncontrolled one.

Post-Run Purge

After solvent recovery, nitrogen pressure clears residual butane from dead legs, recovery coils, and lines that the recovery pump cannot fully evacuate. A thorough post-run nitrogen purge is what allows safe opening of the system for biomass unloading without residual butane vapor present.

Leak Checking with Nitrogen

Nitrogen is the standard gas for pressure-testing a closed-loop system before introducing flammable solvent. The protocol is straightforward: pressurize the system to operating pressure with nitrogen, isolate the source, and monitor for pressure decay over a defined window, typically 10 to 15 minutes.

A system that holds pressure has no significant leaks. A system that drops pressure has a leak that needs to be located and addressed before butane is introduced.

Nitrogen is used for leak checking specifically because it is inert and available in the lab without introducing flammable gas into a system that has not yet been verified as leak-free. Pressurizing with butane to find a leak defeats the safety purpose of the test.

Dewar vs. Cylinder: Supply Format Considerations

Nitrogen for extraction labs comes in two primary formats, and the right choice depends on your consumption rate.

High-Pressure Cylinders

High-pressure nitrogen cylinders in the 200 to 300 cubic foot range are the standard starting point for smaller operations. They integrate easily with existing gas manifolds, require no special storage infrastructure beyond securing against tip-over, and can be sourced through standard industrial gas channels.

For labs running multiple shifts, the cylinder change cycle becomes a logistics task. Running out of nitrogen mid-run because the cylinder depleted faster than expected is a disruptive event, and it happens more often than new operators anticipate.

Liquid Dewars

Cryogenic dewars convert to high-pressure nitrogen gas at point of use through a pressure-building circuit. For operations consuming nitrogen at commercial volumes, dewars dramatically extend the supply window between deliveries and reduce the cost-per-cubic-foot compared to high-pressure cylinders.

The upfront consideration is storage space and pressure-building time. Most mid-size to large extraction operations that have moved to dewar supply report the transition as straightforward and the cost savings as significant enough to justify the switch relatively quickly.

Managing Butane and Nitrogen as One Supply Relationship

Most extractors buying butane are also running nitrogen on the same schedule. Managing them as separate supplier relationships creates unnecessary scheduling complexity and more opportunities for a supply gap on either product to affect production.

AdChem supplies both butane and nitrogen to extraction labs across California and Colorado, with same-day delivery from East Bay and Los Angeles distribution hubs. Consolidating both gases into one delivery cadence simplifies logistics and eliminates the coordination overhead of managing two separate supplier relationships.

Request a bundled quote for butane and nitrogen together, sized to your throughput and your system’s daily nitrogen consumption. The AdChem team works with extraction operators at the supply planning stage, not just the reorder stage.